Showing posts with label budget beauty. Show all posts

Monday, February 20, 2012

Manicure Monday - Australis Nail Colour in Flip Flops - Ltd Edition

Thank you Sydney for giving me a finally nice sunny summer weekend! Although it's Sunday night as i'm writing this (yes I know it's Manicure "Monday") and it's just started raining...

Because of the great weather I decided to have a fun nail weekend and decided to try out the new Australis Nail Colour that I got sent in the shade Flip Flops... it's blue, it's sparkly, it's awesome! It's also limited edition so get thee booty to Priceline or the like and pick one up.. it'll only set you back a RRP of $7.95AUD.

The formula is lovely, I could have gone with 1 coat and been out the door but i'm a stickler for putting 2 coats of polish on and a top coat (Seche Vite).

The royal blue with a gorgeous lighter blue shimmer is perfect for those warm days, or perhaps you want to channel your inner Beyonce and honour the birth of Blue Ivy like Beyonce recently did on her first public appearance since giving birth.


A bit of a close up to see the glitter a bit better, ignore my crappy application of the polish. I was in a rush to take these before I went out for the day.


This product was sent to me for my consideration, all opinions are honest and my own. For further information please read my disclosure policy.


Wednesday, January 25, 2012

Loving.... Face Of Australia Mineral Therapy Illuminator in Angel Fire (NARS ORGASM DUPE ALERT!!)

I've pretty much said everything in the title of this post!

I love this product, it's by Face of Australia and it's a total dupe for the NARS Orgasm Illuminator!

This is a limited edition product, so if your looking to pick it up.. get thee to store now!


When I first swatched this in Priceline I ummm'ed and ahhh'ed over it, would I really use a highlighter that's pigmented and not really a traditional highlighter colour? Then I couldn't stop thinking about it and imagined how I would use it, now I can't see myself without it (and i'm tempted to go buy the rest of the colours).


The consistancy of the product is quite thin, but it is very pigmented and easy to blend into the skin. You do have to be careful though because you may get a bit of product overload come out (see swatches below for a great example!).


The colour though, wowza! If you're a fan of NARS Orgasm get this! It is an absolutely gorgeous peachy pink with a fine gold shimmer. I think it's one of those colours that universally suits all skin tones.

I find the best way to wear it is more as an enhancement on my blush, so i'll put on my blush and then dot a bit of the Illuminator on the top points of my blush and blend in. I have no idea if this is what you're meant to do but it works for me.

Let's see this bad boy (or girl) in action. This is a photo I took in the car on NYE my first outing with the Illuminator on. Yeah I like heavy blush :)


Details!!!

There are 4 colours in this range, and as said earlier they are limited edition! You can pick them up for RRP $14.95AUD from all the usual Face of Australia stockists.

Here is a recent FOTD using the Mineral Therapy Illuminator


Products Used -

Foundation - Illamasqua Skin Base in 07 & Boujois Healthy Mix in 02

Eyes - Naked Palette (Sin on eyelid, Virgin on brow bone, Buck in crease, Half Baked in the middle of the eyelid, Creep in the outer corner), Face of Australia Liquid Eyeliner, Maybelline Colossal Volume Mascara)

Cheeks - NYX Glow & Face of Australia Mineral Therapy Illuminator in Angel Fire

Lips - Revlon Carnation

Product was purchased by me at P to the riceline :) 


Thursday, January 19, 2012

Revlon Moon Drops Lipstick in Blase Apricot & Lilac Champagne - Rare Find!

I found these lipsticks hanging about in a discount beauty store (Cosmo Cosmetics, i'll put where they are at the end of this post). They only cost me $7.00 each!

The Revlon Moon Drops lipsticks aren't readily available in Australia but they seem to be available in the US, so if you can get your hands on them, lucky you!

The lipsticks themselves are moisturising and long lasting, the pink colour especially lasted ages on me even to the point it kind of stained my lips.

The one thing I don't like is the smell, they smell a bit "older lady" to me, it's a small thing but I thought i'd better mention it.

The 2 colours I got were brights from the range...surprise surprise! It seemed my local Cosmo Cosmetics had quite a good range of colours as well so I may go back and get a few more!

The colours I picked up were Blase Apricot & Lilac Champagne


You can find Cosmo Cosmetics at these locations (I'm not entirely sure if they all sell the same products though, sorry!)

Also, I'm just getting these locations from google so if the stores are no longer there... oops! I do know for sure the Parramatta and Merrylands stores are open :)

Cosmo Cosmetics - Parramatta

256 Church Street

Parramatta NSW
(02)9633 1522

Cosmo Cosmetics - Merrylands

Stockland Mall, Merrylands

Cosmo Cosmetics - Hornsby

Pacific Hwy
Hornsby NSW
(02) 9482 4988

Cosmo Cosmetics - Sydney City

Met Centre, George Street

Sydney


Wednesday, January 11, 2012

Essence Hauling! Eyeshadows - Disco Diva, Party All Night & Taupe of the Pops

Essence is a fairly new brand the Australian market and luckily for us it's one of those brands that has come out here and not been overly marked up beyond the point of purchasing. It's still nice and cheap so when you need a quick beauty fix, it's a great place to start! They are stocked in Target locations in Australia (not 100% if all Targets stock them but the ones i've been to have all had it).

I picked up a few things to try out and so far i'm pretty impressed, so much so I want to go and try some more of their products.

Let's start with eyeshadows, I kind of stayed in my comfort zone with 2 neutrals and I picked one brighter colour since it's my aim to add more brighter eye looks to my makeup routine.


As for size, they are 2.5g and the pan is pretty much the size of a Stila pan which comes in at 2.6g.


As far as quality goes, these are pretty good! The colour payoff is great and they are super smooth, however I do think Disco Diva is a bit of a harder shadow to work with when I used it I needed to pack it onto my brush a bit more then the other colours.

The wear is also good, however I always use an eyeshadow primer (Urban Decay Primer Potion) but the colours didn't crease on me at all.

Best part? They cost $3.25each! That's cheaper then a Latte!

Okay are you ready for my pop of colour? Here is a look I did using Disco Diva!


Eye Breakdown -

Lid - Virgin (Urban Decay Naked Palette)

Crease & Blended out above crease - Essence Disco Diva

Lashline - Purple from Stila Creme Bouquet Palette

Lower Lashline - As above with Essence Disco Diva smudged on top

Outer Corner - Creep (Urban Decay Naked Palette)

Browbone - Virgin (Urban Decay Naked Palette)

Monday, January 2, 2012

Budget Beauty - DIY Blonde Highlighting

Most people who get their hair highlighted and especially blondes will tell you it's quite an expensive thing to upkeep, when it came time that my roots were a little out of control it needed to be done but I didn't quite have the spare cash to do it I decided to give at home highlighting a go.

So a bit about how I usually get my hair highlighted, I generally switch between half and full heads of foils and in winter get a few darker blonde bits foiled through and in summer have it all the same lighter blonde. Generally my hair can cost me anywhere between $185-$250 a time.

This is the kit I decided to use


It cost me about $18 from Coles, I've also seen it in Priceline etc. I chose this one because it seemed like the most fail safe and I didn't really want to go about trying to foil my own hair or doing an all over blonde colour. The kit includes a streaking cap, hook, the colour & developer etc and a conditioner to use afterwards.

I also bought a couple of additional things - Tinting Brush (cost me around $3 from priceline) since I was only doing regrowth I wanted to be quite precise, Metal Streaking Cap Hook ($4 from Hairhouse Warehouse) LIFESAVER! The plastic hook provided in the kit is a piece of shit, seriously if you intend on trying a kit like this buy a metal hook! I also made sure I had a few old towels and tons of hair clips to section the hair as well.

Hair Before -


So what you need to do is put the cap on and pull your hair through the holes, there are indicators on the cap for if you only want to highlight a certain part of your hair, since my hair is quite blonde all over I decided at first i'd do the whole cap... This was until I actually started pulling my hair through (by myself). It was taking fricken forever so I ended up just doing the top part and sides and left the underneath.

IMPORTANT! You need to make sure you pull out the entire strand of hair or you end up with what I have now fondly called tiger stripes...sadly I did make this mistake on a few strands of my hair... Lesson learnt!

[caption id="" align="alignnone" width="588" caption="Hair pulled through, no makeup and not a happy face after this took forever!"][/caption]

Once your hair is pulled through (properly!) I combed through the hair to make sure no pieces were snagged and then mixed my colour and applied it to my roots only.

I waited around 40mins and then applied some more colour to my ends (so it'd look even). I'd read when it was the colour of the inside of a banana skin that's when it's done so I went by this and washed it out at around 50mins.

[caption id="" align="alignnone" width="588" caption="Waiting... Waiting.."][/caption]

Then it was time to wash out.. HURRAH! I decided to wash my hair with the cap still on and also condition it so it would slide out a bit easier, it was still a bit of a bitch to get off but wasn't too terrible. Then after drying my hair came the moment of truth...did it work? was it perfect? Yes and No. My regrowth obviously wasn't as noticable but the strands i'd dyed around the crown of my head weren't great, in fact I think I was being a little conservative with how much I was pulling through because when I checked the sides of my hair it was perfect and that's where i was getting a little more careless and pulling through more hair.

So my lessons learnt - Make sure hair is pulled through properly (yep I have some tiger stipes...ROAR!), Pull through more hair in the crown so it's more noticable in the part.

Will I do it again? Most likely, I may use it as an option in between salon highlights just to try and keep the costs down, however I do kind of want to perfect it... that's the Virgo in me talking!

RESULTS! As you can see...not 100% but as a first attempt i'm not overly concerned and it's definitely given me a bit more time to save up for a salon trip :)


Saturday, February 19, 2011

Blogger Challenge set by cclarebear.com

The lovely Clare of cclarebear.com has set a blogger challenge, and being the type who loves a challenge I knew I had to participate.

Plus it was all about finding bargains which I'm pretty good at :)

So the challenge at hand was to stock a makeup kit up for $100 for her friend Lucy. There were a few requests and some background info (images and quote taken from cclarebear.com) -


"Lucy is a wife, and mum of a super cute 15 month old boy, and has just returned to work from maternity leave.

Here’s what Lucy has to say about her current makeup situation from this post:

So I don’t really have all that much. I have run out of mascara, nearly out of powder, the only eye palettes I have are shimmery night ones, so I need a real daytime look. I am kind of ashamed of my makeup stash, it’s just cheap crap I’ve picked up over the years before big events – ie a visit to Gloss to pick up a bright blue eyeshadow that goes with the top I bought specifically for the occasion and have never worn again ROFL

So I prefer powder foundation, as I said, need a primer or something, definitely need a good concealer and something for the lips. Blush if it’s required :)


btw I have just bought some Olay Regenerist for my skin and I LOVE it!!!"

So how did I go? Well first stop was one of my favourite online makeup stores crushcosmetics.com and then I threw in a couple of items she can find practically anywhere that I totally love :) Clare also allowed us to choose one additional "must have" item so keep reading to find out what I chose.

http://www.crushcosmetics.com.au -

NYX Concealer Jar - $9.95AUD


Elf Pressed Powder - $7.95AUD


NYX Nude on Nude Natural Look Kit (I love their shadows!) - $19.95AUD


NYX Powder Blush in Peach (this is one of my everyday go-to blushes) - $11.15AUD


NYX Round Lipstick in Tea Rose (great everyday colour and great formulation) - $5.25AUD


I also think brushes are essential, so here are a few I picked off the website as well


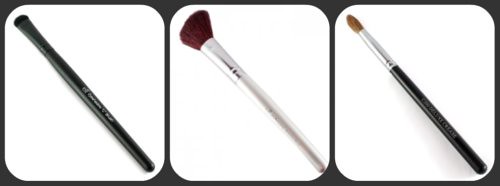
Elf Eyeshadow C Brush - $7.95AUD, Elf Blushing, Bronzing, Contouring Brush - $4.95AUD, Coastal Scents Blending Brush - $10.95AUD

TOTAL - $78.10AUD (includes free shipping over $60... WIN!)

(images all taken from http://www.crushcosmetics.com.au)

A couple of items you can find in most department stores, Priceline & Supermarkets

Face of Australia Primer - approx $8AUD


Covergirl Lashblast Mascara - RRP $17.95AUD


GRAND TOTAL - $104.05

So I did go a little over, but you could always omit the lipstick because there are 2 lip colours in the eyeshadow palette.

Now for my must have product, this can also be purchased from Crush Cosmetics and is an absolute lifesaver of mine!

Urban Decay Primer Potion - $31.95


This was a really fun challenge! If your a blogger give it a go, or even if your not maybe make some suggestions for Lucy on Clare's post.

Monday, December 6, 2010

Products I'm Not Loving...

Usually I review things that I really like, but I thought i'd just tell you guys about a couple of things that I've gotten recently and haven't been enjoying.

Norsca Soft Vanilla Anti Perspirant Deodorant


I can't find a picture of this anywhere, and the Norsca website seems to be having a few issues... Quite like this deodorant. I found an image to sum up my thoughts instead.

I got this because I needed a spare deodorant to leave at my parents house when I stay there and since I like Norscas Cherry Blossom deodorant so much I thought i'd try the Vanilla... Big Mistake!

While it works well as a deodorant, the fragrance is more Eau De Piss then Vanilla. The scent doesn't last long so it's not a total write off but it certainly isn't pleasant. I do hope they work on the scent because if it was a lovely vanilla i'd be totally on board!

If you do want to buy this, good luck you can get it at Supermarkets and Priceline for around $4.50AUD. I do suggest the Cherry Blossom fragrance though, that is lovely.

Tresemme Fresh Start Dry Shampoo


I'll be the first to admit dry shampoos have changed my life and the way I care for my hair. When I saw Tresemme was bringing one out I was quick to pick it up and excited to give it a go since my beloved Batiste was finished up.

Unfortunately it didn't quite tick all the boxes for me in terms of what I need from a dry shampoo. I found it to be a little sticky on my hair and not giving me that fresh washed look that I tend to get from Batiste products.

What I did like about it though was the smell, that was lovely and the size of the product is also a plus!

I will probably finish my can of it because I hate wasting product but I don't think i'll repurchase.

If you do want to try it out, again this is available at Supermarkets and Priceline and will cost around $11.50AUD

Tuesday, November 30, 2010

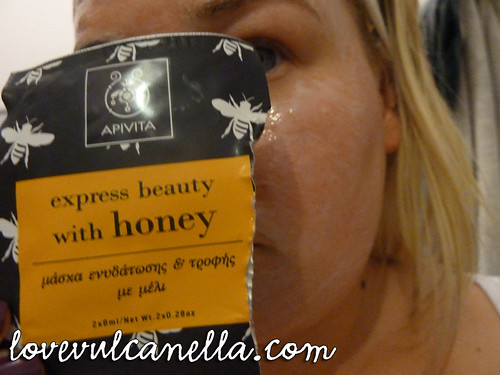
Mask Madness!! Aptiva Express Beauty with Honey

On a little Saturday shop with Jade Musing, I picked up this mask to give a go. I knew I would be home that night and thought i'd treat myself with a little face mask (even though I have a ton still at home to use up....oh well)

We were going through the Aptiva stand at Priceline (yep it's a new range stocked there!) and thought about our troubles, mine being dehydration so I picked a mask in that catagory and went with Honey because well... Honey smells good!


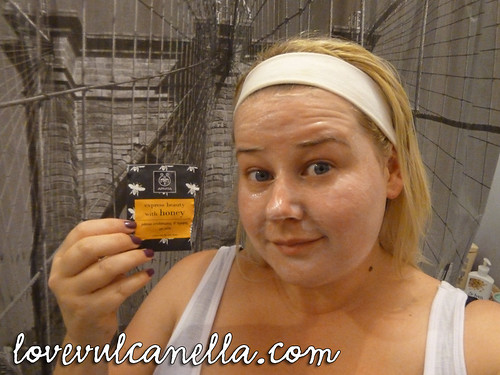
So this mask is unlike any mask i've tried before, it's a very creamy/wet mask. It doesn't tighten on your face like i'm used to with masks so I could still easily sing along to Karaoke Box on MTV while it was doing it's magic. It smells great! The scent even lingers on awhile after you've removed the mask.

Did it do it's job? At first I thought no.... but then as the night wore on I noticed my skin was feeling very soft and looked super glowy! Yay winner!

You can buy this mask for a pack of 2 sachets (very handy indeed) for around $7.50 at Priceline.

Like how I managed to take this on a whirlwind tour to NY on the weekend, that's the Brooklyn Bridge and me and my mask!


Okay Okay it may just be my shower curtain :)

Friday, November 12, 2010

Summer Essentials! Feat Dove, Neutrogena & Gillette

I think we are finally started to see a bit of warm weather here in Sydney, so it's a perfect time to tell you about a few things I'll be using for these upcoming warmer months!

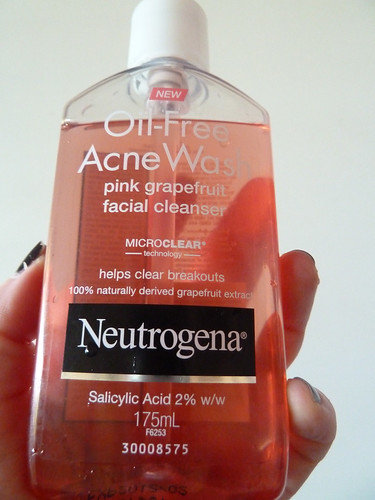
Neutrogena Pink Grapefruit Facial Wash


The thing I love most about this cleanser is the scent, it's so amazingly summery and fresh smelling that I could happily use it as a body wash. I love that when I wash my face with this at night it feels so squeaky clean and I feel like it's really done it's job. I do find it a little drying though so make sure if you have dry skin to try and limit your use of this or do what I do and make sure you apply a really hydrating cream afterwards (I use this at night only and use my night cream afterwards). RRP $14.99AUD

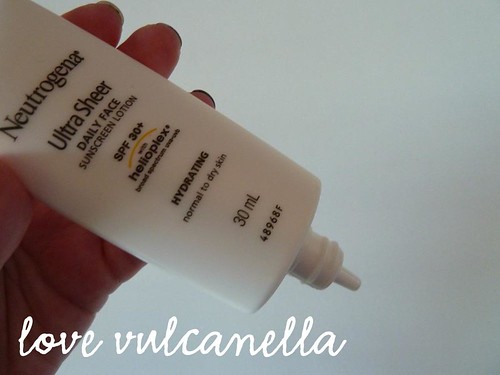
Neutrogena Ultra Sheer Daily Face Sunscreen Lotion SPF30+


If you ever learn anything from my blog, please make it that wearing a sunscreen everyday is essential (even if it's overcast outside). I've been using this Neutrogena one and loving it. I use the hydrating formula and what I like most is that it sinks into the skin quickly. I've recently learnt that you apply facial sunscreen first and then moisturiser, hands up if you were doing it the other way (I was!). The only thing I don't like about this product is the packaging, you really have to squeeze the bottle quite hard to get product out. RRP $14.99AUD

Dove Summer Glow Body Lotion


I really start to feel it's summer when I pull out (or go buy another bottle) my Dove Summer Glow! I started using this product when it was released I think about 2 years ago now and it's my absolute favourite gradual tanning product. I love the smell, to me it embodies summer. I buy it for myself in the medium/dark even though i'm quite fair but I find it just gives me the most amazing golden glow. As with all gradual tanners you apply this daily and it builds up to a nice colour. Once it gets too dark I switch to a regular body moisturiser for a few days and go back to this when it starts fading. If your not the best at applying fake tan this is an absolute fool proof gem! It comes in a bunch of sizes too, but I get the big bottle! RRP $6.99 - 16.99AUD

Gillette Venus Spa Breeze Razor


So it's beginning to get sunny outside, if your anything like me you've let your legs into such a terrible state that we may need to call in the tree loppers to take care of the situation. Enter a gorgeous razor that not only smells absolutely devine (white tea! yummmm!) but actually does the job and does it easily with a super close shave....plus it's pink which is a major plus in my books.

I'm not a waxer, I'm a shaver! I love the convenience of knowing if I have a bit of stubble on my legs and need to wear a dress or shorts, I can just go over my legs with the razor and go out the door with smooth legs.

I also adore the moisturising bars on this razor, it eliminates the need for another product in the bathroom and makes it such a good option to take travelling as well. Have I mentioned the smell? Yes? well again....YUMMMMMMMM!! RRP $18.15AUD (for the complete system)

I will be doing a few summer essentials posts in the future so keep a look out for those! 

Most of these products can be purchased in Priceline and Supermarkets.

All products were purchased by me, except for the Gilette Venus Spa Breeze Razor which was sent for consideration.

Don't forget to wear your sunscreen!!! :)

Friday, November 5, 2010

Dorky McDorkus loves Biore Deep Cleansing Pore Strips

Dorky McDorkus is what i'm calling myself in this post, due to my dorky photo which you will soon see.

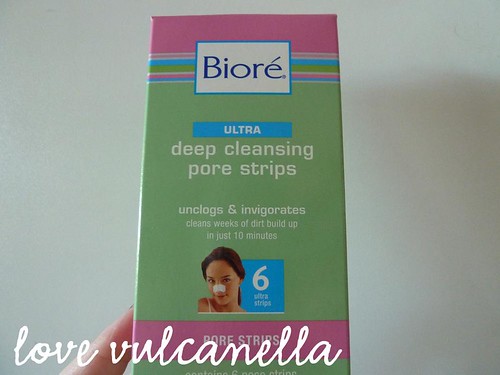
Weekly I love to shed my nose of those disgusting little things we call blackheads and I do so with my Deep Cleansing Biore Pore Strips, they rip those suckers out like nothing else.  They RRP for $5.99AUD for a 6 pack or a mega pack of 14 strips will set you back $9.99AUD. Let's call this a bargain product shall we.

Totally simple to use, just wet your nose and pop on the strip, wait for it to dry (around 10mins) and rip that sucker off! Sometimes it dries a little too much so just put a little bit of water to moisten it up so removal is easy and a little less painless.

Once you've done this, look at the strip....GGGGGGGGGGGGGGGGGGGGGGGGGGROSS!! I must be a little sadistic/weird but I love seeing those little blackheads on the strip after i've ripped it off. Gives me a sense of accomplishment.

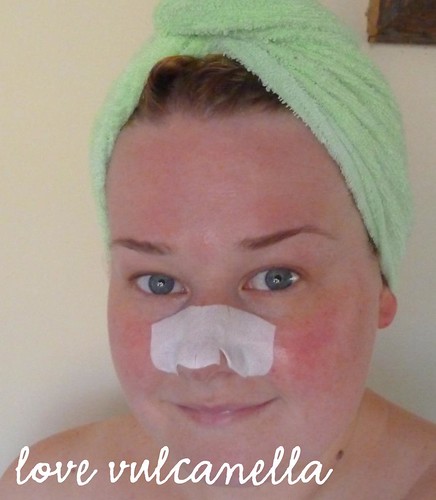
Here I am modelling the must have fashion accessory of right now... The Pore Strip. To be authentic for the blog I took this photo exactly how I do my stripping (eek not that kind!) Straight after a shower, then while I'm picking my clothes for the day/getting dressed whoosh 10mins is gone and it's time to RIP THE STRIP (omg Biore you need to hire me as your new marketing person)


Tuesday, September 21, 2010

Mascara Showdown! Max Factor False Lash Effect vs Covergirl Lash Blast


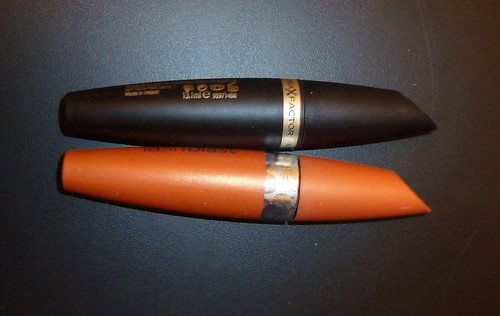
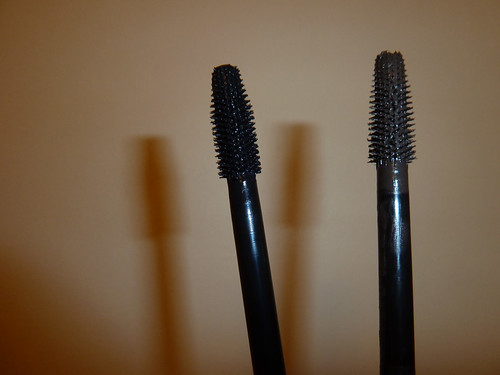
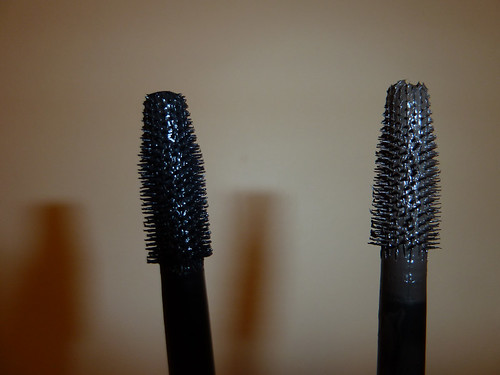
As you may already know, Covergirl Lash Blast Mascara is my holy grail Mascara.. love it like a fat kid loves cake kinda love :) Recently on a trip to Priceline with Jade we noticed how similar the Max Factor Falsh Lash Effect looks to the Lash Blast. Not one to shy away from trying and comparing something I grabbed a tube of Falsh Lash Effect to try and find a difference between the two.

Here are my pictures comparing the two.. see much difference? I don't. Just a note that the brown mascara is Lash Blast and the Black is False Lash Effect.


I have been wearing the False Lash Effect since I purchased it and while the look on my lashes is exactly the same as when i'm wearing Lash Blast there is no difference in the volume and length. I did notice more flaking with the Falsh Lash Effect, so this puts Lash Blast out in front of this race.

The other thing is the price, Max Factor False Lash Effect retails for a RRP $24.95 AUD and Covergirl Lash Blast retails for RRP $17.95. Of course savvy shoppers can find them cheaper at times but generally CG Lash Blast will always be the cheaper and in my opinion the better option.

Wednesday, September 15, 2010

Wipes Wednesday!!! Feat. Biore, Nivea & Swisspers

On Saturday I had the pleasure of going with Jade of Jade Musing (did you click? well you should have!) to the PRIMPED event at David Jones in the city. It was informative and we got a great goodie bag! However my only gripe with the whole thing is how blah we both felt after seeing Yaz Turkers amazing skin!! not one single blemish, smooth as silk and just perfection!

So after we had a look around in the big smoke (ie the city) we headed back to our little suburb, did I mention we live in the same suburb? yay! As always we declared our love for Priceline and had a bit of a looksie.

This is where Wipes Wednesday came into play, we both bought wipes and thought why not? So once again click on Jade Musings blog to see her take on Wipes Wednesday!

Wipes... what can I say they are an everyday part of my routine and I know when I go into the bathroom at night and use my wipes to remove my makeup that the day is well and truly over. It gives me such satisfaction to look down at the previously white wipe and see my slap on it because I know it's doing the job it's meant to be doing. Fear not I also cleanse with a normal cleanser after using my wipes... I believe your face can never be too clean.

There are so many different types on the market now they basically need their own section in Priceline. I've been using a few and there are some on my wishlist (Hello Yes To Carrots! and Simple) that I'm planning on getting to try next (There may be Wipes Wednesday Part Deux!) 

Nivea Visage Gentle Facial Cleansing Wipes (RRP $7.50AUD)


I bought these on a whim, I was in Melbourne and forgot my regular wipes and needed some more... yes needed! I couldn't find my regular brand so decided to try something new (ahh the life of a beauty blogger!) I really like nivea products and my skin was feeling a little dry and unhappy thanks to the cold I was getting over so these seemed perfect. I used them while I was away and they were okay, but not great. They removed my makeup effectively but they felt a little dryer then what I am used to and I didn't feel I was getting a really good clean from them. I also didn't find that they helped my dry skin much at all. I've still got some left at home but I don't find myself reaching for them all that often which really I should do because i'm concerned they'll dry out quicker then any others I have on the go.

Swisspers Cleansing Eye Makeup Remover Pads (RRP $4.95AUD)


These are a new type of wipe i've been using. Funny fact though when I was cleaning out my makeup room and sorting it all on the weekend I found another unopened packet of these that I must have bought awhile ago and never used... oops! These are great! They are soft, gentle and remove my eye makeup really easily. During the week i'm pretty plain jane and just wear a little black eyeliner and mascara but on the weekend when things get a little more exciting and I do proper eye look one swipe and it's gone! I don't really recommend using regular makeup wipes to remove eye makeup as they may be a litte harsh.

 Biore Daily Deep Pore Cleansing Wipes (RRP $8.99AUD)


LOOOOOOOOOOOOOOOOOOOOOOOOOOOOOOVE! These are my daily go-to wipes and I love them so much... can you tell? They really feel like they clean my face completely (again, I still do use a regular cleanser afterwards) but these seem to take off every little trace of my makeup and make my skin feel smooth, and refreshed they claim they cleanse, tone and exfoliate (I wish they'd also do my dishes but we can't have everything right?). The towels are moist (I hate using that word... but that's the only way to describe them) and they have little ridges or something that seem to help with the cleaning (or they are a gimmick? I don't know) The only flaw I have with these is that they smell a little chemically for my liking, but they work so I ignore that and it's really not that bad anyway! Please please please please never ever discontinue these Biore people!

Don't forget to check out Jade Musing for her take on Wipes Wednesday!

As always don't forget my Giveaway!! you only have until Sunday to be entered, so get crack a lackin!

Ax
All products were purchased by me. Images are from www.beautydirectory.com.au
Related Posts Plugin for WordPress, Blogger...