
This could be the blogger in me, but I obsessively take photos of my nails when I do them. I guess for the reason that I may eventually blog about them but I have so many un-blogged nail pictures I thought i'd start posting them.
These looks are fairly recent (oldest being 2 weeks ago in fact) but I will also dig through the archives that is my photo album on my iphone to bring you some historic nail looks i've sported.
Before I get into my nail pictures, you must see this amazing little contraption I purchased solely for the use of painting my nails. I was visiting my nan a few months ago and she had one which she uses for drawing, I borrowed it to paint my nails and was so impressed I had to find one myself.
Hello Stable Table! This isn't a regular Stable Table though, it's pimped out! It has a light and a cup holder, which I refer to as the nail polish holder! It generally holds 3-4 bottles of polish and the light is awesome for making sure your nail polish application isn't shit. This is a dodgy picture but it gives you an idea of what it looks like.
I got mine from Homeart and I believe it's on sale this week for $9.95!
(P.S. I am not endorsed by Homeart, in fact i'd never been to a Homeart store until I was told of this amazing table!)

My first nail look is a simple accent glittered nail, I wanted something subtle and pastel but a little bit fun so I used Essie Lilacism (RRP $18.95AUD) on all nails and put on China Glaze Dollhouse (RRP $10.95AUD) on the accent nail for a bit of bling.

The next mani is a gradient glittler mani, using one of my favourite polishes of all time OPI Lincoln Park After Dark - RRP $19.95AUD with a splash of Nails Inc Bloomsbury Square - RRP $18.95AUD as the gradient. (sorry I don't know stockists in Australia yet so i've had to link to Beauty Bay.) A little tip for doing glitter gradient nails, wipe one side of the brush in the polish bottle and use that for the top part of the gradient, the other side of the brush with the most polish on it use that for the tip where you want the most polish to go.
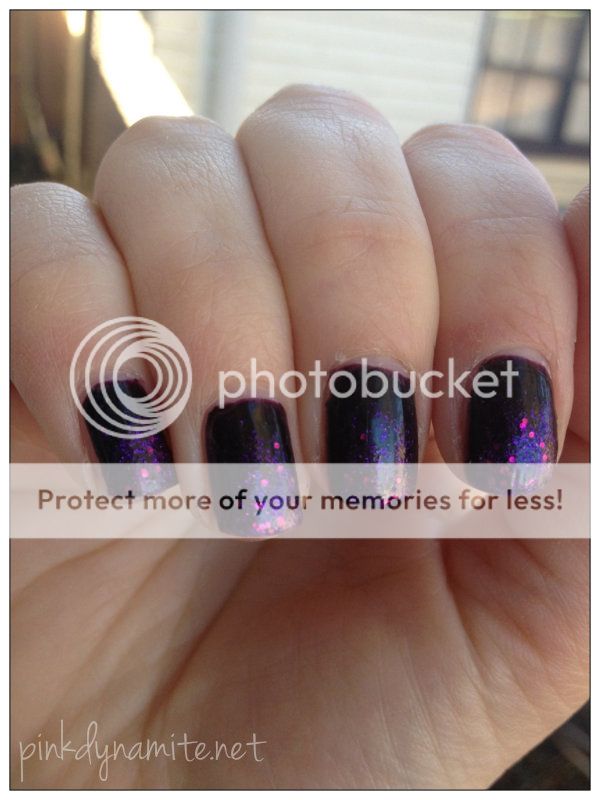
As always my topcoat of choice is Seche Vite (RRP $14.95AUD)
Here is a little preview of a nail look i'm going to be attempting to do a video tutorial of this weekend. This is a mistake turned out cool in my opinion :) Stay tuned for Tie Dye Nails!! (I've mucked around with the picture a bit because it's only a sneak peek). Ignore the shitty clean up, this was just taken to show some friends before I tidied it up properly.

Disclosure Policy - All products were purchased by me, honesty as always!

Can't wait for your tie dye nails tutorial!! And I tried the OPI Linkin Park After Dark the other day - LOVE the shade! Very vampy and when mixed with glitter - even better! :)
ReplyDeleteGreat post! What an awesome table, I WANT! :)
ReplyDeleteGet thee to Homeart! It's only $10!
ReplyDeleteThe table is adorable! Come visit iFabbo sometime! http://www.ifabbo.com x
ReplyDelete